Seaching Seaching & Seaching

Custom Search

Feel free to search for anythings! Just enter whatever word.

Google
 

Wellcum! Wellcum!

To all my dear readers if u find this site too 'horny' then please poke into My Other Site where I am more 'normal!!! Feel free to poke into any link within the post as it normally led to more 'interesting' post! Rest assure it is mostly not paid post! No ads for a 'horny' blogger!!!!
Showing posts with label DIY. Show all posts

Sunday, July 27, 2008

U Need A Poosie/Asshole……..For Pokeing!

Unless u likes DIY or u like to be a virgin forever, a poosie/asshole is needed for pokeing. Poosie or asshole is needed as u need to poke in ur ‘didi’ for pokeing. Without a poosie that is not called pokeing. An asshole can also be used but those is not the normal case & in most case not a common practice.

Now for a complete HT ( Home Theater )system u need a source before u can started off & enjoyed the world of having a good HT system in urs own house( Just like pokeing, u need to have a poosie first before u can do pokeing & in the process enjoyed the world of pokeing! )! In most HT system a good DVD player is the beginning of a source of a HT system although any source can be used like radio, pc or even a good mp3 player but this is rare ( Just like using a asshole for pokeing! ).

Well I am a normal guy ( Just a bit more ‘horny’ then most guy! ) so I will have a DVD player as my source for my HT system. But if I am having a HTiB ( Home Theater in a Box ) then, no need to consider as it included the player as well. Now to buy a DVD I will consider the following point:-

1. The player must be reliable & most importantly must be able to play all sorts of discs. It must be able to play ‘nice movie’ which is normally from ‘china made’ ie not following any ‘international recording standard’. It must be able to play all sort of discs & not choosy. Some banded DVD player are very choosy it that it can only play ‘original’ movie discs.

2. The picture quality must be good. So in this case I will choose only DVD player with HDMI output as I will need it to connected to my flat panel TV ( LCD/Plasma which type I choose will be post up in later post ). DVD with HDMI is the way to go as it cans up-scale DVD quality to 1080p.

3. Sound output. This will depend on your sound system. Does it has 5.1 analogue input? If it does then it is better for u to look for a DVD player with 5.1 analogue output. This will not be a problem if u r using a av receiver as most have digital/optical input. All DVD players have optical output & some better one have both optical & digital output.

So buying & choosing a DVD player is not so complex & most good DVD player with HDMI output are now quite cheap. Beside DVD player u can also consider Blue Ray player. BD movie quality is much better when compare to DVD movie quality.

If u r starting off with a complete new HT system, u can consider having a BD player as more & more BD movie in now available. Besides playing BR disc it can also play back DVD & CD. In most case the DVD picture quality is much better when compared to DVD with up-scaling as it picture processing chip is much better as compared to those in HDMI DVD player.

Beside BD player u can also consider PS3! Yes! PS3 game console, besides playing PS2 game u can also use it to play BD disc. I heard picture quality is very good but I will not consider it as I don’t know if it is reliable when using it to play DVD.

So which to choose? Well I can consider a good banded HDMI DVD player ( mostly likely Pioneer as my present HTiB is a Pioneer but no HTMI ) or a BD player ( It will be super clear to watch BD ‘ahem ahem’ movie! He! He! If got ‘ahem ahem’ BD movie in the first case! ) or even a PS3!

So which will it be? It all boils down to the question of money. These conclude my DIY post on how I set up & choose my HT system. Part I ( Pokeing Sight ) & Part 2 ( Pokeing Sound ).

Friday, July 25, 2008

Pokeing/Farking Must Have Sound!!! ‘Oh! Oh! Ahhhhhhhhhhhhhh!!!’

When u do pokeing, it is most ‘stimulating’ if your partner moan with pleasure ( He! He! Or is it with pain!!!??? ).And u can judge ur pokeing ‘performance’ by her moan & the sound she made! Or maybe she might find u very sexy when u poke in with full force while u grunt with all ur effort! The fact is, with sound pokeing is more enjoyable!

Same as watching movie!He! He! If got sight but no sound, watching the best movie with blue ray quality is also no ‘syoik’ wan! Sorry this post is not about pokeing’s sound. On my previous DIY entry, I blog about visual aspect of Home Theater System ( HT ) & so now I will blog about the audio part.

Buying a HT system is also a ‘confusing’ matter. What types to choose? Well the following factors are what I will consider:-

1.What type? 2.1 ie. Two speakers ( L & R ) plus one sub woofer. This is the basic set-up. Mostly use as PC audio system. 5.1 ie Five speaker ( L & R, LR & RR & Centre ) plus one sub woofer. Better then 2.1 system as the sound field is all surround. 7.1 ( L & R, LR & RR, LBR & RBR & Centre ) plus one sub woofer. Currently the best sound system set up as it carter to the latest sound decoding ( more on this later ). 7.2 is the same as 7.1 except got two sub woofer. It is suppose to give more ‘oop’ to your bass ( not much of a factor to consider if u have a very powerful sub woofer )!

2.What sort of movie u watch? Asstro? If u spend most of ur time watching watching Asstro programs, then u don’t even need to buy a sound system. The TV speaker is good enough. Yes, Asstro sound is that ‘normal/lousy’! If u spend most of ur time watching Korean love drama or Chinese love/family/action drama ( whole series in on a DVD ), then the TV speaker is good enough as such movie don’t have any sound effect at all. Now if u watch mostly English movie & some good quality Chinese movie with Dolby Digital or DTS sound encoded then buying a sound system is necessary to enjoy the sound effect. Latest sound effect are Dolby Digital True Hd & DTS Hd which is available only in blue ray disk.

3.Where do u watch this movie? If u watch ur movie on a Pc then a 2.1 sound system will do. If u watch ur movie in ur bedroom then a 2.1 or a 5.1 will do ( Unless ur bedroom is very big, how to have a good poke with so many speaker laying around? ). If u watch it in ur living room then a 5.1 will do or if ur living room is big then the best set-up will be a 7.1 system.

4.What type? By this I meant the sound system, as in all in one like HTiB ( Home Theater In a Box ) which is normally a 5.1 set-up. Everything is included ( except the TV ) like the DVD player, 5 speakers & a sub woofer. Very simple to set-up & quite neat & tidy. The only cons is up-grading is almost non-existing & on some cheap HTiB the sound might not be very powerful ( Perfect for small living room & in apartment/condominium ). Component system. So far the best set-up as it allows u to up-grade & in most case the sound is much better & more powerful than those in HTiB. A proper HT sound system will consist of a AV Receiver ( The most important component & usually the most expensive part! ), a set of speakers ( 5 or 6 speakers depend on ur set-up ie. 5.1 or 7.1 ) & a power sub woofer.

Now having decided on the type of sound system u think it is suitable for u, u now end up even more confuse! If u decided to set up a 2.1 system then no problem, very simple! Buy what u can afforded. If u decided to buy a HTiB also not much of a problem as u only have to decided on the ‘style’ & brand of the HTiB & of cause the price! Some high-end HTiB can cost as much as a entry level HT component system. And it sound real good, only that up-grading is non-existing. Basically just set it up & u r good to go! Now the headache is on choosing a HT component system! U have to consider the following:-

1.What type of av receiver? 5.1 or 7.1? It is much better to buy a 7.1 capable av receiver as it able to output the real surround sound as needed by Dolby True HD, DTS HD & other sound code. 7.1 is not really necessary to enjoyed surround sound but a 7.1 give a much better sound effect. HDMI ( High Definition Multi-media Interface )input? Well it is much better to have a av receiver with HDMI input plus decoding capabilities as Dolby True HD & DTS HD can only be inputted via HDMI. But at this moment of time such av receiver is real expensive.

2.What type of speaker? Front speaker is a must & you got to decided to have floor standing or bookshelf? It is much prefer to have a pair of floor standing speaker as it can really output the full range of sound, and it look much better! A nice center speaker is needed as it can produce the much need dialogs when watching movie. Surround speaker, 2 pair for a 7.1 set up or 1 pair for a 5.1 set up? If got the space go for 2 pair. It will have a much better effect. U can buy the speaker stage by stage but matching different type of speaker is a skill & so to save all the trouble u can consider buying whole set of matching HT speaker. It is much cheaper than buying separately. Do remember to set up speaker with the same impedance ie. All are 8 ohm or all are 6 ohm type. U risk damaging ur av receiver if different ohm are used.

3.What type of power sub woofer? Another headache! So many different types to consider! Side firing or down firing? To me as long as give off a nice & low bass effect good enough. Well just choose the type u like & look nice.

In conclusion it all cum down to money! How much is ur budget? Money no problem? Then by all meant go for the latest av receiver & pair it up with a good & expensive set speakers plus a big & high powered sub woofer, powerful enough to shake down the whole house! He! He! Rm 20k at least I think is just about enough to buy such a kick ass av sound system!

Now where is my Rm20k???? Where arrr??? Remember my job as ‘gigolo’ still not ‘jadi’ yet!!!! This conclude my 'pokeing sound system' next on the manual will be my 'poosie' post! Previous post is 'pokeing sight' in my HT system. He! He! Stay tuned!

This is what I end up buying, a Pioneer VSX 917s system.

Tuesday, July 22, 2008

DIY!!! Long Time No Do!!! Pokeing sight!

DIY refer to Do-It-Yourself. Now if u r a ‘horny’ fellow ( like urs truly ) it also meant ‘Go & Fark Yourself’ that is do pokeing using ‘five sisters’ or whatever. For more detail poke into my DIY entry. Pokeing sight! Don't u think it is very sexy & most stimulating if u can see pokeing in action! I am very sure most of my readers will get a 'hard on' or get 'wet' if u watch nice 'ahem ahem' movie!

Now this entry is not about horny ‘diy’ or about pokeing action, it is about the ‘normal diy’ diy & about sight. It has being a long time since I post up a 'normal' DIY.

What happen when your TV gone ‘kaput’!!! This is what happen to my TV! One night I am watching & enjoying myself watching a very nice ‘ahem ahem’ movie! Now ‘ahem ahem’ movie usually all yellow yellow in color. When suddenly everything shown on TV turn red! If showing red poosie, then still ok to me but then it show even the ‘hair down there’ also red in color!!! Dam ! My TV gives me red color! How to see???

No choice but to buy a new TV ( This Samsung flat 34" TV very high tech wan, nobody know how to repaired it! ). This is post about TV & Home Theater ( on later post), HT for short! What to consider & what type to buy! No choice as I spend most of all my ‘non-pokeing’ time watching movie. The following is how I will choose my TV:-

1.What is the purpose of your TV?! To watch TV programs ie. Asstrow programe? Now if I spend 70% of my time watching Asstrow then buying a TV is a simple affair! Just buy any 34” flat TV will do or at the most 42” LCD or plasma TV. Anything bigger will be terrible as asstrow signer are of ‘low definition’ type ie 480i resolution ( The higher the resolution the better! Just like low resolution pic! The ‘hair’ show no clear once u zoom up the pic! High resolution pic will show nice ‘hair’ pic even if u zoom it up! ) so if u use big TV the pic quality will be bad! But I don’t really watch Asstrow, only the motor gp, animal planet ( animal pokeing ) & news ( So that I know who poke who, who is sleeping all the time or who blow up who! ).

2.What sort of movie u watch? I do spend a lot of time watching good quality DVD movie. Most of which are action movie ( ‘ahem ahem’ movie can also be consider action movie as got fast & furious pokeing action )! Because of this LCD TV is out for me, as LCD reaction time is ‘slow’ ( the fastest LCD time is 4ms, most of which is 8 ms )which is slow when compared to Plasma TV ( 0.001ms ). This is very important as when u watch fast action on LCD, due to the slow reaction time the ‘action’ will be blur blur wan! This is terrible for me! I want to see very clear ‘ahem ahem’ action!

3.Since I watch mainly good quality, fast action DVD movie it meant I will have to buy a Full HD ( Full High Definition, it meant this TV has the abilities to display resolution of 1,920 x 1,080 ) Plasma TV as I want to see the ‘hair’ clearly. HD ready ( 1,366 X 768 ) will do for me if I seat more than 10 feet away from my TV & my TV is less then 42". But then I seat about 8 feet away only & I want a big TV! So I have to buy a Full HD Plasma TV! He! He! Big TV can see much more detail mah! So no need to zoom up the picture.

4.How big??? This is a very important factor to consider! Now my formal TV is a flat screen 34” crt TV, so by right I should buy myself a 34” or bigger TV ( should have improvement mah ). But unfortunately the biggest crt TV now is only 29”. So ‘older’ TV is out. Beside this to watch DVD in high definition u need HDMI ( Hight Definition Multi-media Interface ) input. This HDMI input can support up to 1080p picture quality. Actually depend on the type of LCD/Plasma u buy. But most can support up to 1080i ( 1080 interlace ). Which is almost as good as 1080p ( 1080 progressive ). That meant only LCD or Plasma TV bigger than 34” to consider!

5.Other factors to consider are like styling & cost! Plasma is usually more expensive but will give better picture quality. LCD looks good & is usually cheaper & beside this LCD have a lots of brands to choose from. For Plasma TV very limited choice as only Panasonic, Pioneer, Samsung & LG got Plasma TV ( Correct me if I am wrong ). For Full HD Plasma only Panasonic & Pioneer got, and this cost a bomb! Beside this if u like to watch in bright place then LCD is suitable. But I like to watch movie in dim light!

Now in summary if u r like me……….like to watch good quality fast & furious movie & like to see detail, seat quite close to TV ( so can see clearly mah ) then I suppose a 42”Full HD Plasma TV will be the perfect choice for me!

But in reality the following is what I am using NOW!

A Panasonic 32" LCD model TX-32LX75M the cheapest model in Panasonic LCD TV! Well I will post up my 'review' on the performance of this LCD in later post! Oh! I have post what happen to me in this entry & this entry on my other more 'normal' site.

This conclude my 'pokeing sight' part on my HT system. I do hope this entry is of some use to my dear readers as nowadays buying a TV is a rather confusing affair! Feel free to post all yours comment & if the information here is wrong do feel free to correct me. Next on the manual is 'pokeing sound' entry!

This is what I end up buying a big ass 50" Plasma TV!

Wednesday, November 21, 2007

DIY radiator flushing!

Have u check ur car radiator coolant lately? Is ur car always on ‘heat’ ie the engine temp is on the high side ( more then the half way mark )? If so then it is very likely that ur radiator’s coolant is already not longer functioning as it should i.e. keep ur engine ‘cool’ & rust preventing ( some people didn’t even have coolant, just plain water & while the engine might not overheat in the short run but it will due to rusting ).

Radiator flushing is the process of flushing out the radiator content before u fill it up with new coolant ( it is important to flush out the old coolant before u put in the new coolant as old & new coolant mixed together is no good ). Radiator flushing is being done at workshop or car service centre ( the job done might not be through as it took a least more then 15mintes & usually they pour in flushing agent which is very corrosive ) but u can diy at ur own home.

Over the weekend I DIY ( DIY is do it yourself ok! Not this type of DIY which is totally different but much more enjoyable ) my Nissan Sentra 1.6 auto Xe radiator flushing. I do the flushing as I discover that the coolant has lost it green color ( the Nissan is use by gf, and as lady as long as the car can move everything’s is A Ok ) for goodness know how long already!

This is how the flushing is being done as shown in the pic. First u disconnect the top big hose on top of the radiator ( the top hose is the outlet i.e. hot coolant from the engine ) then u connect in ur garden hose pouring in water all the time . Then u started the engine. U can see old coolant pouring out from the disconnected top hose. Continuing with the engine running until u see clear water coming out of the top hose ( in my case I let the process go on for half an hour with engine running ). This is how radiator flushing is done DIY style.

Please don't do radiator flushing with a hot engine! Wait for the engine to cool down first before u open the radiator's cap or disconnect the top hose. When engine is hot the water inside the radiator is very hot & under pressure so the danger of busting hot water is very real ( I don't want my reader who try out this diy to end-up half cooked if unsure or have no confident then better don't try this diy but u can try this DIY lah! He! He! ).

Now u have to fill in the new coolant. Pour out the radiator content by loosening the radiator outlet tap located on the left or right bottom corner of the radiator ( in my Nissan it is on the inside right corner ). Let out the content of the radiator ( don’t fully unscrew the tap so that flow is small as u need to let out just a bit more then the amount of coolant u r pouring in ).

The reason why I don’t empty the whole radiator content before I do radiator flushing is that the engine water pump ( located in the engine block ) don’t function with air in the radiator cooling system ( that is also why sometime engine overheat occur when u change radiator coolant as the radiator might be fill with water but engine block water piping is dry especially if the water pump is not filled with water ). In this case u will have to fill in the water through the top hose until u can see water pouring out out of the top hose.

In my case I pour in two bottles of Toyota long life coolant 1 liter each as it give longer & lasting protection for my Nissan ( I use Toyota coolant as it is cheaper at RM18.00 per bottle ). Using the correct type of coolant is important, engine block using case iron or alloy engine block, use different type of coolant.

I do hope the above information is useful to my dear readers! And to my regular readers sorry if this post is not so ‘hor ny’ as once in a blue moon the ‘real me’ appear!

Thursday, September 13, 2007

Mosquitoes Netting Replacement.....

It has being a long time since I post up DIY entry! I meant real DIY not this type of DIY ( which is most enjoyable. Poke in & have a look. He! He! )!

This is my house front door. It is 'protected' by an aluminium grill with integrated mosquitoes netting. The original netting is made of fibre, grey in colour. However it doesn't last. So I have it changed to wire netting & hope that it last longer. Yes it did last longer but because my my dam cat it just last for about 2 years. So with all the cat's tear on it I have to change it.

First u got to remove the aluminium grills. It is not difficult just remove 12 screws only ( it depends on how it is being fitted but it is more or less the same ) inside the grills. U can also just remove & replace the mosquito net without taking down the grills but u need a chair to do it & more troublesome to do. So I prefer to take down the grills & change the net on the floor. As u can see from the pic the net got a few tear, a big wan near the lock. I have being wanting to change the mosquito net for quite sometime but always have not time for it. Cum night time I get poke by a few hundred mosquitoes ( so I can forget about pokeing in the living room )!


The mosquito net is secured to the grills by a rubber tubing. Just pull out the rubber tubing & the old net will cum out! Next line up the new net ( I bought the whole roll as it is cheaper & u can use it to replace all netting ) then u slowly poke in the rubber tubing. I just poke in just deep enough to secure the net to the grills in all direction, only then I poke in fully the rubber tubing while I can also 'adjust' the net so that it is tight in all direction. I use a flat headed screwdriver to poke in the rubber tubing.As shown in the pic below I only cut off the excess net when I have secure the net to the grills.

After changing the mosquito net I just fitted back the aluminium grill. By doing DIY I did save a lot as mosquito net cost Rm1.50 per square feet if change by the pro, so a 8x10 feet's will cost u Rm120, but the whole roll of nets only cost me RM90 ( & also I can change a lot of mosquito net with the exces ).

Wednesday, April 18, 2007

Programing

A continuation from last entry...

After setting up all the hardware it is time for the installing of the computer programe ( it is useless haveing the best hardware if it is 'brainless' ), this is a important stage as it show how good the hardware really is & if the hardware is defective.

Programe installed are Windows XP service pack 2 ( I intended to installed windows vista but I heard that it is full of bugs ), windows office 2003 & some high end pc game. I am disappointed as installing the XP took more the 15 mintes ( I compare to a older system using AMD 3 ghz, which took about 10 mintes to install ) & I also don't like the format in installing the driver for the mainboard & graphic card ( I compare to MSI system ). Once the installation is complete I didn't not feel that the computer operated in anyway different as compared to older system like the AMD system. In fact booting up is a bit slower then the AMD. Apart from this the game play beautifully. I suppost this is due to the graphic card. As mention the graphic card use silent pipe in the heatsink without the use of cooling fan so of couse the cpu operated silently. But I did touched the graphic card heatsink...........it is very hot. So hot that I almost burn mine finger ( I believed I can cook egg on this heatsink if I can of couse ). And finally I must say that the latest Intel powered system no longer support windows 98 or Me.

Overall I am disappointed with Intel ( luckly the system is not mine ). So if I want to upgrade my computer system, it will be AMD.

Monday, April 16, 2007

965P Mainboard, Intel Core 2 Duo Processor & Nvidia 7600 GS Graphics Accelerator


A 'hor ny' review of Intel P965 express chipset based mainboard, Intel Core 2 Dua 2.13ghz processor & Nvidia 7600 gs 512mb graphics accelerator. So my friend bought the above mention computer component & also one 1gb of ddr2 memory as an up-grade of his old computer. So he ask to to install it for him ( as usual I couldn't resist a DIY with the lastest computer hardware ).

GIGABYTE S-SERIES 965P-DS3


What a mouthfull of name! Actually this is the mainboard ( also call motherboard ). This is the main circuit board on which all computer component is attached to. This particular mainboard from Gigabyte is not the top model, it is rank near the top. The top model is not available unless by special order & it will cost a bomb! ( In fact there is only one of this mainboard at the shop as it is quite expensive ).

The most impressive feature of this board is of couse the Intel P965 express chipset. This chipset control all fuction of the mainboard ( sort of like the part of the brain which control bodily function ) & also the mainboard electronic part which is made of high quality material. Eg all capacitor are solid stage ( in this case all the silver small short cylinder like things u see in pic are solid capacitor, nomal capacitor are coloured with a -tive strip on one side ) this made the mainboard more reliable & expensive. Also this board has a build in surround sound output ( imaging playing game in full surround sound but u will have to poke in 6 speaker ). Plus of couse some othe feature like build in network etc. Beside this I like the dark blue colour of the mainboard. The mainboard also support FSB 1333 mhz processor ( this meant it can support high end cpu. FSB meant front speed bus measure in mhz, it actually meant the speed that a intruction is to be carried out from CPU to the mainboard component, like for eg the brain asking your 'bro' to do some pokeing & how fast your 'bro' respond to your brain instruction ). Assessory consist of back panel, sata cable & conventional ide cable ( I expect more than this ) & one driver CD. This mainboard run on the newer 24 pin power supply, luckly it also support the older 20 pins power supply.
INTEL CORE 2 DUO PROCESSOR 2.13 GHZ


Another mouthfull of name ( why don't Intel call it P5 or P4XX as it is sort of 2 P4 on one package ). This is rather confusing, in fact another lower spec Intel cpu is called Intel core 2 processor. As shown in the above pic the cpu cum together with one big heatsink, the cpu itself is about the size of a 50 cents coin. This cpu FSB is 1066 mhz with 2 mb l2 cache ( this is not top of the range intel cpu ). For nomal usage any cpu higher then 2 ghz is more then enought. For faster computer the quality of the mainboard & more importantly the amount of system ram is important.

GIGABYTE GEFORCE 7600GS 512MB GRAPHICS ACCELERATOR


Yah! Another mouthfull ( why don't they call it geforce gen seven-six?? ). This is the nvidia geforce seven serie graphic card using PCI express slot. This is the latest graphic slot with speed up to 16X whereas the older AGP slot can support up to 8X only. ( All this 16X or 8X sound a bit por*nish but it actually meant how fast the mainboard can pass graphic instruction to the graphic card ). This is a sort of small circuit board to be poke into a slot on the mainboard. As shown in the pic above the card came with a big gold colour heatsink & some sort of cooling pipeing & without cooling fan. The function of graphic card is to produce graphic of couse. The feature of this card is the nvidia 7600gs chipset which is a graphic cpu ( this is not the top range chipset, the eight series is the current top dog & buying it now will cost u an arm & both legs ). Of couse the top range graphic cpu can support even the best pc game there is with all the game graphic option set to full value. I perfer nvidia chipset to other chipset as this is the graphic card supported by almost all pc gamer.The other main feature of this particular card is the 'silent pipe heatsink'. It is silent as there is no cooling fan. The design seem very complicated with a lof of cooling fins ( if this card belong to me I will have a fine time cleaning up those fins ). And this card also cum with a 512 mb of graphic ram. The higher the ram is the better is it performance in gameing especially those 3D RPG game. Together with the card are 2 cd one is the driver disk & surprise, the other is a DVD game 'call of juarez'. Plus one dvd input socket.

DDR 2 1GB SYSTEM RAM

Finally I have to mention the small green card shown in the first pic. That is the DDR 2 system ram in this case 1 GB ie giga byte. This small card is an essential part of computer hardware it act as an temporary storage of cpu intruction ( for eg your brain instruct ur 'bro' to go pokeing which ur 'bro' obey but at the same time it send back instruction to unload the cum, of couse the brain don't wan to unload all at one go so it instruct the 'ball' to unloard the cum bit by bit the 'ball' in this case act as system ram. Of couse the higher the ram the better it is, like having a bigger 'ball'. Yah! Yah! I known this is not a very good example to explain the function of system ram but I like to hornyrise any example ).

Putting Together the four component.

For system ram it is a simple case of pokeing the ram to the system ram slots ( there is only one way to slot in, due to a notch on the ram ). For graphic card it is the same case. U poke it in to the PCI express slot.( U only poke in the graphic card when the mainboard is being assemble onto the computer casing already ).


I like the latest design of Intel cpu as pokeing in the cpu is rather simple. As shown in the pic ( sorry the pic is a bit blur as my camera is already 4 years old or maybe I took lousy pic ) the connecting pins of the cpu is on the mainboard called LGA775 ( hundreds of small needles in the cpu bay ) where as the cpu bottom side itself is flat with hundres of small contact points. This made handling the cpu so much easier.( I have to be very careful with the older socket type as hundreds of small pins is on the cpu itself & if one small pin is out of allinement or the pin is broken then kiss that cpu goodbye ). U just put the cpu in its bay in one position due to two notchs on the cpu bay & on the cpu itself. Before u do that u have to remove the protective cover both on the mainboard cpu bay & on the cpu itself. Then just attached the cpu heatsink onto the cpu & mainboard. Care must be taken to ensure that the cooling fan can operate due to its exposed disigne ( actually when I assemble the whole computer one of the power cable stuck the cpu cooling fan luckly I notice in time or else the cpu is a fried wan )

As the above is only an upgrade, the full computer system hardware consist of the following ( the bracket corespond to body par,t well sort off ) :

1.CPU ( brain )
2.Mainboard ( body )
3.System Ram ( 'ball' )
4.Graphic card ( no needed if mainboard got built in, cheapo cpu system ) ( 'bro' )
5.Hard disk ( stomach )
6.CD rom ( mouth )
7.A-drive ( small mouth )
8.Computer casing including power supply ( clothing & heart )
9.Keyboard & mouse ( hand & leg )
10. Monitor
11.Speaker

Feel free to coment & advice if the above information or example use is incorrect as I am just an amature ( using 'hor ny' example )

To be continue...............

Sunday, April 08, 2007

Computer Keyboard.....Cleaning/Maintance

The computer's keyboard is one very essential part of the computer apart from the mouse ( without the mouse it is still possible to operate the computer, don't ask me how, without the mouse I am helpless ) & it just happen to be the cheapest part of the computer ( ok a lousy mouse may be cheaper ). Being mechanical in nature it is subject to failure if abused. Of course high quality keyboard can stand up to abuse & cost more then RM100-00. Abuse like constant pokeing at certain key when playing games ( in my case typing also as I type using two finger first I use my index & when that finger get tired from pokeing at the keyboard I then use my middle finger of course with either a cigarette or my tongue hanging slightly out of my mouth ).

After sometime u will find that the keyboard can become very dirty & certain key will stuck & lost its springiness. It is time to do some checking & cleaning. Checking to see if the keyboard is beyond repair for the sticky key or cleaning for dirty keyboard ( if the keyboard is the cheap type just throw away & buy a new wan ).
As it is mine nature to DIY to save money, I open up the keyboard & clean it. Opening up the keyboard is an easy affair just a few screws at the bottom of the keyboard & it open up in two half the upper half which house the keys & the bottom half which contain the circuits board. In the pic above the white pieces is the membrane circuit board, if dirty just brush off the dust/dirt using brush, if the membrane board ( usually made of silicone rubber ) is broken or got tear or the rubber buttons is depressed then this keyboard is 'kaput'. Do not wash the membrane board.


The upper part of the keyboard hold all the keys. The keys can be remove from the inside out usually secure by individual clips. As shown the keyboard is very dirty once the keys is removed. U can then clean the board & keys using soap. Dry it out in the sun then reassemble back the keys just by pressing the individual keys back into the holes.

Finally before taking out the keys it is advisable to take a digital pic of the keyboard or have another keyboard ready so that u known which key go to which hole. I must say I spend an enjoyable half hour figuring which key is which just like jigsaw. Eg it is N or Z, I or 1, O or 0 etc.

Monday, April 02, 2007

Cleaning National Air-con

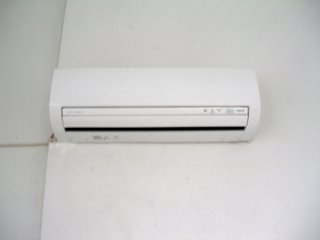
While everbody is either fooling around or being fooled on April Fool day, I just spend the day cleaning my very dirty National air-con.


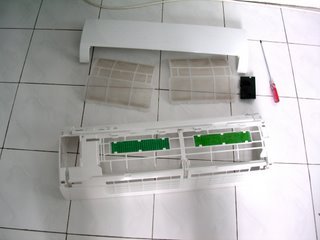
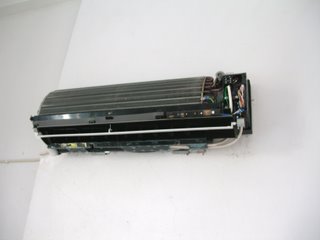
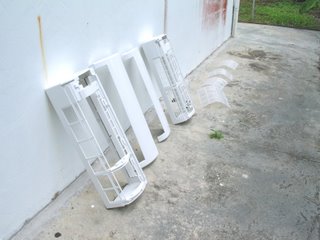
As shown it is very dirty, the filter is clog with dust & even fine hair!!The cooling fins is being coated with dirt as well, no wander it is no so cool nowaday. Takeing the whole caseing apart only involve removing 4 screws. Two for the main cover, one to remove the lovern motor & one earthing screw. I have to remove the lovern assembly as I have to clean the blower fan's fin located inside the air-con unit as clean fan' fin is more efficient & quiet. Care must be taken when removeing the lovern as it is secure by ledge. Normally air con cleaning just involve cleaning the filter & cooling fins, since I am doing the cleaning myself I might as well do a good job & give it a completed clean out.


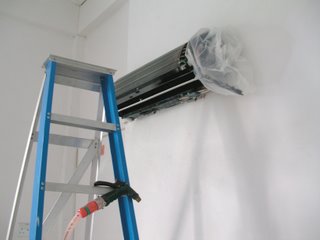
Shown above the cleaned air-con part & cooling fins. Before cleaning the cooling fin made sure that you cover up the electrical board with plastic bag. Nomally I use dishs washer to clean the various part but I sometime use liquid soap as it give a nice smell after that. I clean the cooling & blower fan fins using brush & sponges & clean off using garden hose ( after cleaning the air-con the room is almost flooded hence I end-up cleaning the room as well ).

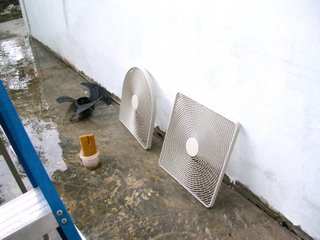
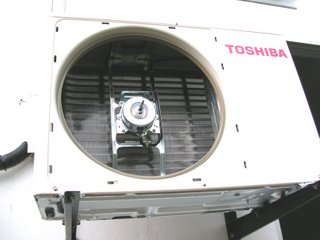
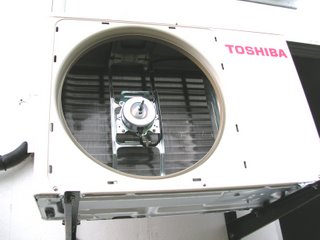
Now for outside unit. To take out the fan I have to disassembler the caseing which is a weird 2 blade designe, so I might take apart its caseing total number of screws is 14 plus one nut for the fan propelar. Now cleaning the cooling fins is easier using brush, dish washer & spraying it clean using garden hose. Care must be taken when takeing apart the caseing to advoid cut.


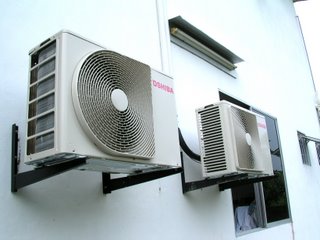
I have made a pervious entry on cleaning air-con, but on that occassion I am clean Toshiba air-con. It is much easier to clean Toshiba then National air-con. in term of usage I perfer Toshiba air-con to National now known as Panasonic. The whole process of cleaning air-con took me half a day.

Tuesday, March 06, 2007

DIY Kitchen Hood Installation & Maintence

Kitchen hood is now consider a necessary acessory in the kitchen. Its main function is to s uck out all the smoke from the cooking as m'sian like to do a lot of frying with oil ( hence the food here taste better ). Apart from this I suppose the kitchen hood can also be use to show off together with other high tech gismo in the kitchen when guest visit the kitchen.


I choose kitchen hood base on its s ucking power ( afterall its main function is to s uck out cooking smoke) measure in cube square meters. The s ucking power will depend on the type of fan use. From mine survey I find that 16 blades turbine fan is the most powerfull at 1300 cube square meters of air per mintes. Apart from s ucking power, I will consider the price, feature, build material & maybe brand.

In the end I choose the above base on its 2 powerfull s ucking fans, auto cleaning feature & also its slim design. I also like the twin light.

Installing the kitchen hood is a stright forward process. In mine case it is made easier as I have already prepare the smoke outlet together with the flexible aluminium tube. I use aluminium hose as it is more durable in the long run even though it is more expensive now. Plastic flexible outlet hose is not heat resistent & will become brittle in the long run. However when installing the aluminium hose to the hood's outlets care must be taken so as no to overstright the hose or the aluminium joint will be disjoint showing split. I have also prepare the power point.

The kitchen hood is install just by drilling two hole & fixing the suppled wall bracked to the wall. The hight of the kitchen hood is measure between the cooking strove & the fan about 36 inches. Too high the kitchen hood the s ucking power is decrease. You can adjust the hight by about 3 inches using the bracket.

As shown the s ucking power is strong enought to s uck up the wok cover. This is also the method I use to check on kitchen hood. To enable your kitchen hood to be efficient, regular clean up is necessary. U can just wripe the surface area using mild soap or just the dish cleaner.

For the fan to be in optimal operation condition u have to clean them regularly, once a week if possible. As the fan is made of aluminium it get corroded with salty smoke. Takeing out the fan is very tidious ( I do take apart everythings when I want to oiled the fan motors ) , thus a easier method is to switch on the kitchen hood & spray directly on to the spining fan with dish cleaner using a sprayer. Immediately you will notice all the oilly liquide collected on the oil collection pan, you will have to empty several pan until the liquide is just the dish cleaner. After that u will spray the fan with water to clean out the dish cleaner. The whole process take from a few mintes to more than 15 mintes depended on how dirty the fans is.

As for me I usually connected a small hose to the oil collection hole & just spray on the fans. ( I am too lazy to empty out the small oil pan several time). After that I just put back the oil pan. I also don't fix the fan grill as without the grill I don't have to wash the oilly grill, but you have to be carefull that you don't put your head near the spining fan , this is highly unlikely as your head will be above the frying pan to do this.

The above diy save me RM100-oo. Quite enought for me to spend on other things or activities.

Friday, March 02, 2007

Computer Maintence......Hardware

This CNY holiday ( hornyday 2 me ) is most boring wan. Mine usual partner instead of giving 'ang pow' is carrying 'ang pow' herself.( According to tradition she is not qualified to give 'ang pow' ). Hence no 'hor ny activities' so I go & give mine computer a clean up.

Depend on your computer, branded computer like dell,hp,nec etc operate quietly as they content only one cooling fan runing at min revolution, whereas croned computer is usually noisy as it got a few cooling fans. ( But branded computer cost a bomb & not value for money ). After sometime your might find that your computer is runing more & more noisy & become unstable. This is becouse the cooling fans & heatsink inside is cloged with dust & even hair, hence heat & noise become a issue.


First open up the computer casing & take out all the cooling fans carefully. Cooling fans are usually on cpu, agp, power supply unit & on some mainboad.Be extra carefull when u remove the agp card from the slot then u remove the heatsink & cooling fan if ur agp card don't have cooling fan, u just have to clean the heatsink only. This also apply to removing cpu cooling fan & its heatsink which is secure by clips.U will also have to remove the memory ram from its slots carefully. It is normally dusty as it is situated near cpu's heatsink & cooling fan.Hence heated up contributing to system unstabilities.Oh before I forgot please switch off & remove the power cord from the power socket. I don't want my dear reader to be electrocuted.

I clean using flat brushes the type use for water colour one small size to clean small fans & one big size to clean up mainboard. For me I open up everythings even the power supply unite & clean up the dust inside. I also use a valcum cleaner to suckup & blowclean ( eeeh! suckup & blowclean sound like a hor ny phase ) my computer, monitor & keyboard.

The above DIY is to be carried out at ur own risk as a computer mainboard content a lof of delicate component, if u r rought handed ur computer will go 'kaput'. I shall not be liable.As for me I open up everythings even the power supply unit to clean up the dust.

I like to do DIY if possible as I get to save some monies & to gain knowledge. However the above service is provided in most computer shop for a fee of couse. I do provide computer service if I happen to have time & if I happen to be near where u r free of monetary charge in return for frienship & free food as giving free service made me very hungry. ( Actually I meant to say is I will give free computer service & hor ny service if I am free & with my bro approval. Without my bro approval then just computer service only. He! He! Just a hor ny though ).

Feel free to ask OK. And wish all mine reader a happy ' Jar Goh May' ie 15th day CNY this cuming 11-03-07.

Saturday, December 16, 2006

DIY Ac Pump

Due to bad economic nowaday I have being saving real hard for rainny day. One way I can save is on mine fuel expenses, hence I perfer to travel on this nowaday..........


So I only use mine Pajero once a week or when its rain.(Mine company don't fancy a wet & soaked to the ball Horny Ang Moh reporting to work). Thus on that day when I want to repair the punture tyre after it have being manually pump using bicycle, the Pajero do start after a few kick. It feel very shuggish no power at all even if I press the paddel to the floor. After moving a few hundred meter from the house the damn car died on me.

NOW WHAT!! As '####!!!%%%18XXXX' go through mine mind. I have no choice but to tow back the Pajero using mine other car a Nissan Sentra saloon. Small car towing big car back to mine house. Luckly only a few hundred meter & now on the main road. That will be real emberassing.

Now for those of u who don't have desiel car, it is usually no much of a problem compare to petrol car. If it don't start or start with difficulty it is usually the battery is weak, heater is gone, ac pump leaking air, fuel pump faulty or worse case engine head having problem. In mine case I discover that the ac pump is leaking air. This is how it look like...............
The one on the left is the recon one after I seach the whole town for it on mine trusty Honda Ex5. Cost me RM60-00.The one on the right is the faulty one, look much newer but it is leaking air & new one cost a bomb! Anyway I took out and fix in the recon ac pump myself. I use the recon fuel filter as well as I discover that it is still very clean even though it look very dirty on the outside.


The faulty ac pump without the connector. The container contain gasoline which I use together with toot brush to clean the recon ac pump. So on that day I spend RM60-00 on ac pump (will cost around RM150-00 to RM200-00 if u tow ur car to workshop & they will kill like pig with all sort of reason why u car don't start ) & RM7-00 on tyre punture.

Wednesday, November 01, 2006

DIY Cleaning Air-Con

Almost everyone have one or two air-con at home nowaday as it is now very cheap to buy an air-con. It is cheap to buy but the running cost depend on the brand and the air-con condition. Dirty ac is not effecient hence ur electricty bill will go up, ur ac will work extra hard 2 keep u cool in the long run increase the noise level of ac and workload of ac part. The following is mine own diy way of cleaning ac.


1. Take off the ac cover thus exposing the inner part expeciallty the coolling fin.


2.Cover up the ac electrical part with plastic bag.
Afterthat use water 2 hose down the cooling fin with water, made sure the water pressure is no high or else u will flatten the cooling fins. Use dishes cleaner or liquid soap 2 clean the cooling fin using soft brush, I use the largest water colour brush to applied on the cooling fins then hose clean with water. Of course the water will flow onto the floor so I have rectangle container below the ac.


3.Clean the ac cover & filter & left it out 2 dry.


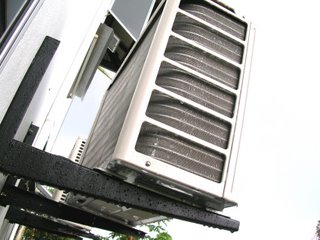
4.Now 4 ac outside unite take off the covering
& the fan exposing the evaporating fin. Hose
clean with water first inside out then from
behind the ac units.Clean the covering & fan.


After all the above u just reassember back every thing. U will fine ur ac now cooler & not so noisy. I basically do the above every 3 months. I clean the air filter every 2 weeks.